Contact Support
Help Center

Two-way syncing a channel calendar with RentalBell
Preventing back to back bookings by using the Preparation Time tool
How to add the RentalBell availability calendar to a Weebly powered website
How to add the RentalBell availability calendar to a WIX powered website


Showing your availability calendar to potential customers

To embed an availability calendar for your rental on your website, follow the steps below:

  1. Log into Rental Bell.
  2. If you have already added your rental to RentalBell, then you’ll see a button to the top right of the calendar that says Calendar Tools. Click that and then choose Public Calendar & Widget Creator.
  3. In the small window that opens up, click Widget Creator.
  4. If you have more than one rental on RentalBell, you’ll see a dropdown menu where you can choose which rental you would like to create a calendar for. Complete the remaining fields to customize the look and feel of the calendar.
  5. After customizing you can preview the calendar look and when you are satisfied, press the Get the Code button.
  6. Three options appear for you. Widget Code: the calendar widget code for your website, Public Link to this Calendar: A link to the calendar hosted on RentalBell. This is useful for sending a link to your calendar in emails and newsletters. iCal URL: The iCal URL for importing your rental calendar into 3rd party apps like Google Calendar and Apple Calendar.
  7. Choose Widget Code: Copy the html code and paste the code where you would like it to appear on your website. This requires a little bit of html coding knowledge. If you outsourced your website design to a web designer, send them this code and they will insert it into your website. That’s it!

A multi-rental availability calendar shows your availability for all your rentals one below the other (See example). This calendar has the customizable option to allow the customer to click on a particular rental to view a single rental calendar, be redirected to a specific URL, or turned off.

Note: This calendar is only available for rentals with the standard subscription level.

To embed a multi-rental availability calendar for your rentals on your website, follow the steps below:

  1. Log into Rental Bell.
  2. If you have already added your rentals to RentalBell and they have the standard-level subscription, make sure you are on the My Rentals page and click on Calendar Tools and choose Multi-Rental Public Calendar & Widget Creator.
  3. In the small window that opens up, click Widget Creator.
  4. Customize the look and feel of the calendar.
  5. After customizing you can preview the calendar look and when you are satisfied, press the Get the Code button.
  6. Two options appear for you. Widget Code: the calendar widget code for your website, Public Link to this Calendar: A link to the calendar hosted on RentalBell. This is useful for sending a link to your calendar in emails and newsletters.
  7. Choose Widget Code: Copy the html code and paste the code where you would like it to appear on your website. This requires a little bit of html coding knowledge. If you outsourced your website design to a web designer, send them this code and they will insert it into your website. That’s it!

We have created a video tutorial explaining how to embed the RentalBell availability calendar to a website that runs on Weebly:

We have created a video tutorial explaining how to embed the RentalBell availability calendar to a website that runs on WIX:

RentalBell’s public calendar and embeddable calendar widget for your rental website is currently offered in 8 languages: English, French, German, Portugese, Spanish, Italian, Dutch, Norwegian. Additional languages are available upon request.

Yes you can! follow the steps below:

  1. Log into Rental Bell.
  2. If you have already added your rental to RentalBell, then you’ll see a button to the top right of the calendar that says “Calendar Tools”. Click that and then choose Publicly Viewable Calendar Link.
  3. Copy and Paste the URL in the browser's address bar into your email or newsletter. If you wish to customize the look of the calendar, click the Customize Calendar button and after customizing the look of your calendar, Click Get the Code button and grab the URL from the Option 2 box.
Team Calendar: Sharing your rental calendar with your cleaners, managers, owners etc.

A public calendar is an availability calendar that is intended for your potential guests to see. It shows them what availability you have for your rental. The Team Calendar is intended for your cleaners, property managers, owners, or other teammates, and shows more details about your bookings that you need to communicate to your teammates.

A Team Calendar:

  1. Distinguishes between bookings and blocks.
  2. Shows historical bookings and blocks.
  3. Gives special instructions that you want to communicate to your teammates for a particular booking (eg: "prepare the unit for an early 2PM check-in", "make up the pullout couch", "Replace the microwave"). We call this feature Team Notes.

Note: Team Calendars are not available for Basic Rental subscriptions. Upgrade your rentals to Standard to use this feature.

Team Calendars require the Standard Subscription level

Here's where to find them:

  1. Log into Rental Bell.
  2. If you have already added your rentals to RentalBell and they have the standard-level subscription, make sure you are on the My Rentals page and click on Calendar Tools and choose Team Calendar & Widget Creator.
  3. If you want to customize the look and feel of your Team Calendar or embed it on your website, click Customize Calendar or Widget Creator.
Syncing availability calendars

There is also a video tutorial on how to do this.

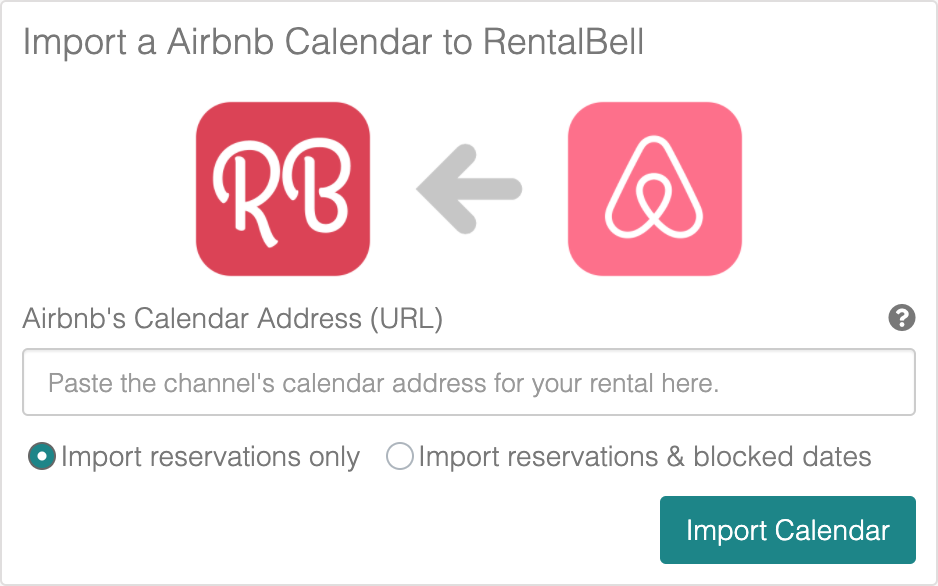
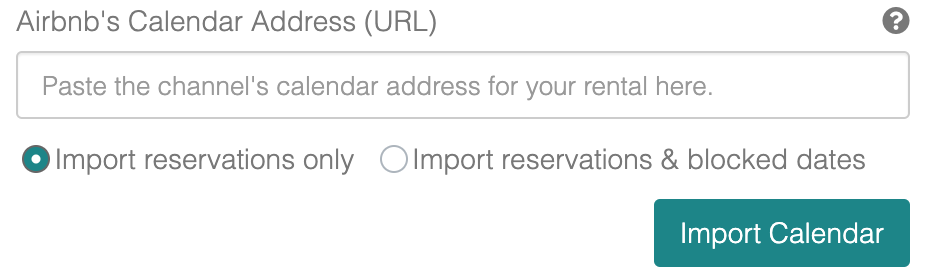
To sync your AirBnb calendar with your rental on RentalBell, visit your rental page on RentalBell and click on Calendar Tools and then Add/Sync a New Channel. A window will open up where you will connect the AirBnb and RentalBell calendars together. Select AirBnb from the dropdown menu.

Retreive your Airbnb calendar and add it to RentalBell:
  1. Log in to your Airbnb account
  2. Select 'Your Listing'
  3. Click 'Calendar' or 'Go to Calendar'
  4. Click 'Availability Settings'
  5. Under the Sync Calendar heading, Click 'Export Calendar'
  6. Copy & paste the link in RentalBell in the AirBnb's Calendar Address (URL) box shown here and click the Import Calendar button
Export your RentalBell calendar to Airbnb:
  1. Log in to your Airbnb account
  2. Select Your Listing
  3. Click Calendar or Go to Calendar
  4. Click Availability Settings
  5. Under the Sync Calendar heading, Click Import Calendar
  6. Copy the link shown in the Export RentalBell's Calendar to Airbnb box and paste the link into Airbnb's Calendar address URL
  7. On RentalBell, click Done or if you would like to sync another channel calendar with RentalBell, click Done, Add More Channels
Tip: If you are ever unsure what to do, look for the icons throughout RentalBell and tap them for helpful information. If you still need help, you can always Contact us.

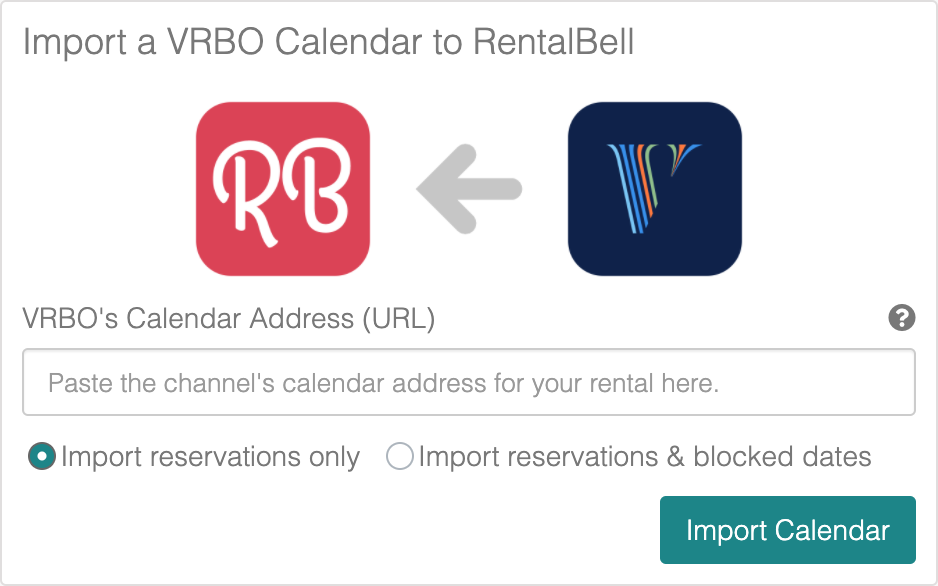
To sync your VRBO calendar with your rental on RentalBell, visit your rental page on RentalBell and click on Calendar Tools and then Add/Sync a New Channel. A window will open up where you will connect the VRBO and RentalBell calendars together. Select VRBO from the dropdown menu.

Retreive your VRBO calendar and add it to RentalBell:
  1. Log in to your VRBO account
  2. Click on Manage and then View Calendar next to your rental
  3. Click on Import/Export
  4. Click on Export calendar
  5. Copy & paste the link in RentalBell in the VRBO's Calendar Address (URL) box shown here and click the Import Calendar button
Export your RentalBell calendar to VRBO:
  1. Log in to your VRBO account
  2. Click on Manage and then View Calendar next to your rental
  3. Click on Import/Export
  4. Click on Import calendar
  5. Copy the link shown in the Export RentalBell's Calendar to VRBO box and paste the link into VRBO's Calendar URL box, name the calendar (eg. RentalBell) and then click Import Calendar
  6. On RentalBell, click Done or if you would like to sync another channel calendar with RentalBell, click Done, Add More Channels
Tip: If you are ever unsure what to do, look for the icons throughout RentalBell and tap them for helpful information. If you still need help, you can always Contact us.

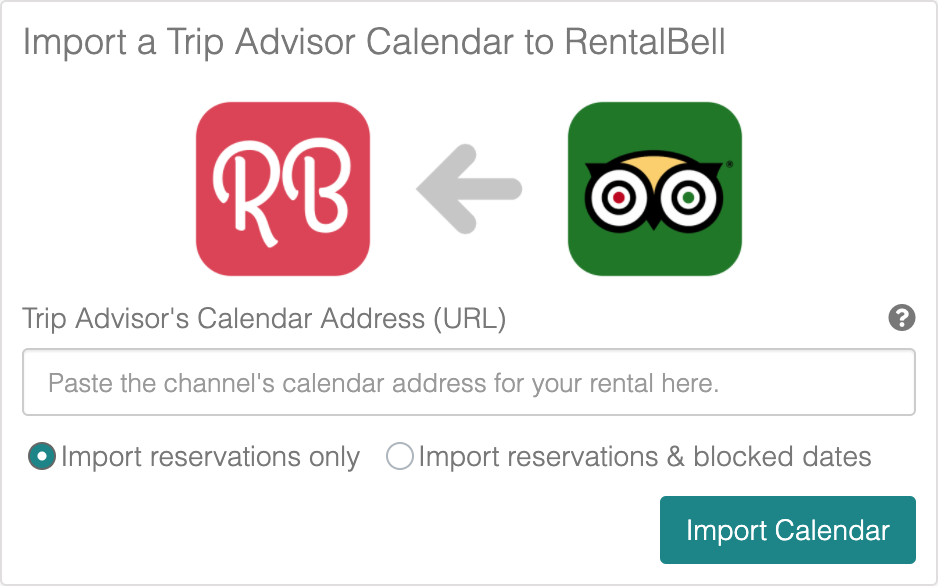
To sync your Trip Advisor calendar with your rental on RentalBell, visit your rental page on RentalBell and click on Calendar Tools and then Add/Sync a New Channel. A window will open up where you will connect the Trip Advisor and RentalBell calendars together. Select Trip Advisor from the dropdown menu.

Retreive your Trip Advisor calendar and add it to RentalBell:
  1. Log in to your Trip Advisor account
  2. Click Calendar at the top of the page
  3. Click Export on the right of the page
  4. Copy & paste the link in RentalBell in the Trip Advisor's Calendar Address (URL) box shown here and click the Import Calendar button
Export your RentalBell calendar to Trip Advisor:
  1. Log in to your Trip Advisor account
  2. Click Calendar at the top of the page
  3. Click Import on the right of the page
  4. Click the Other button
  5. Copy the link shown in the Export RentalBell's Calendar to Trip Advisor box and paste the link into Trip Advisors' Export Link (URL) box, name the calendar (eg. RentalBell) and then click Import
  6. On RentalBell, click Done or if you would like to sync another channel calendar with RentalBell, click Done, Add More Channels
Tip: If you are ever unsure what to do, look for the icons throughout RentalBell and tap them for helpful information. If you still need help, you can always Contact us.

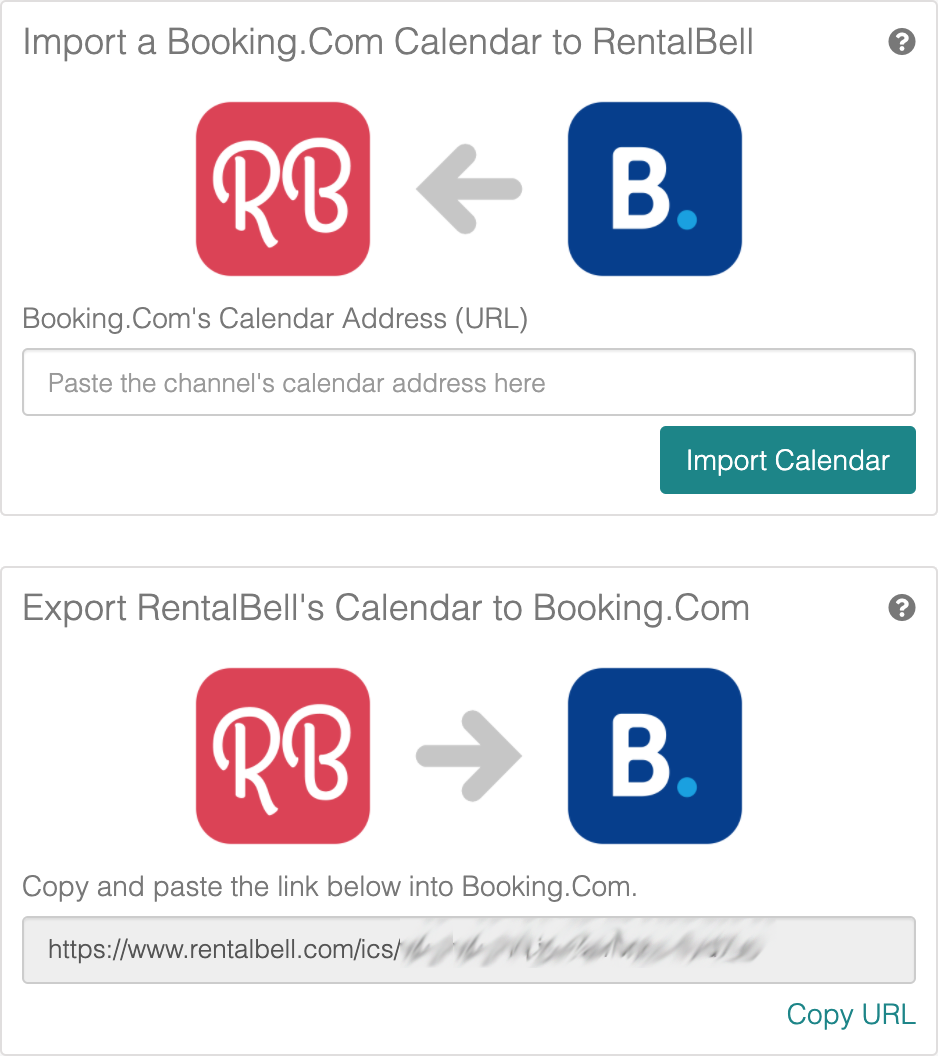
To sync your Booking.com calendar with your rental on RentalBell, visit your rental page on RentalBell and click on Calendar Tools and then Add/Sync a New Channel. A window will open up where you will connect the Booking.com and RentalBell calendars together. Select Booking.com from the dropdown menu.

  1. Log in to your Booking.com account
  2. Click Calendar at the top of the page
  3. Click Import on the right of the page
  4. Click the Other button
  5. Copy the link shown in the Export RentalBell's Calendar to Booking.com box and paste the link into Booking.com's iCal link box, name the calendar (eg. RentalBell) and then click Next step
  6. Copy & paste the link Booking.com provides into RentalBell in the Booking.com's Calendar Address (URL) box shown here and click the Import Calendar button
  7. Now click Done or if you would like to sync another channel calendar with RentalBell, click Done, Add More Channels
Tip: If you are ever unsure what to do, look for the icons throughout RentalBell and tap them for helpful information. If you still need help, you can always Contact us.

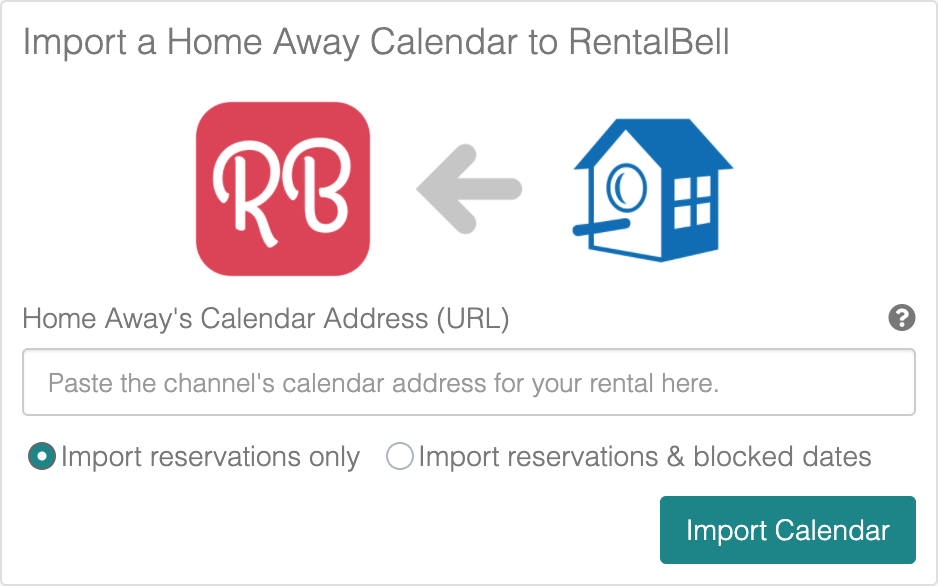
To sync your Home Away calendar with your rental on RentalBell, visit your rental page on RentalBell and click on Calendar Tools and then Add/Sync a New Channel. A window will open up where you will connect the Home Away and RentalBell calendars together. Select Home Away from the dropdown menu.

Retreive your Home Away calendar and add it to RentalBell:
  1. Log in to your Home Away account
  2. Click on Manage and then View Calendar next to your rental
  3. Click on Import/Export
  4. Click on Export calendar
  5. Copy & paste the link in RentalBell in the Home Away's Calendar Address (URL) box shown here and click the Import Calendar button
Export your RentalBell calendar to Home Away:
  1. Log in to your Home Away account
  2. Click on Manage and then View Calendar next to your rental
  3. Click on Import/Export
  4. Click on Import calendar
  5. Copy the link shown in the Export RentalBell's Calendar to Home Away box and paste the link into Home Away's Calendar URL box, name the calendar (eg. RentalBell) and then click Import Calendar
  6. On RentalBell, click Done or if you would like to sync another channel calendar with RentalBell, click Done, Add More Channels
Tip: If you are ever unsure what to do, look for the icons throughout RentalBell and tap them for helpful information. If you still need help, you can always Contact us.

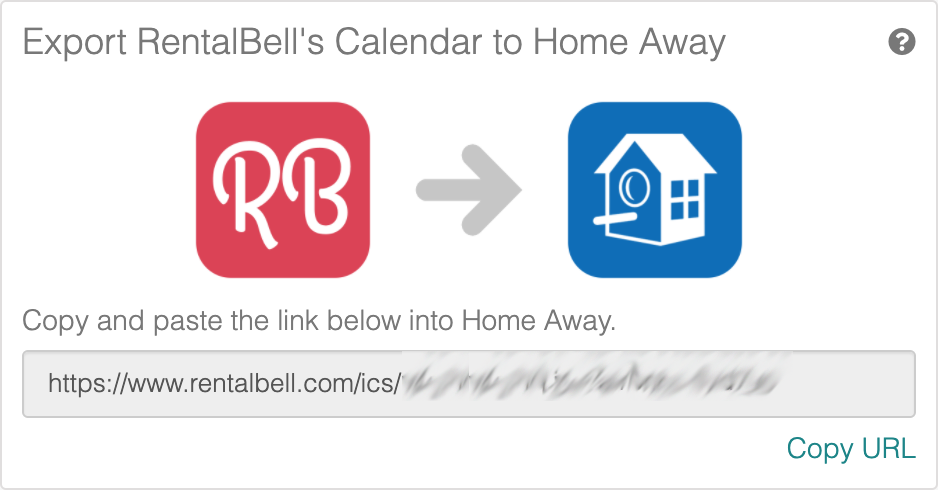
When syncing a channel's calendar with RentalBell, for the main channels (AirBnb, VRBO, HomeAway and TripAdvisor), you have the option to import Reservations only or Reservations and Blocked Dates. So what should you pick? Ideally, Reservations only. Here's why:

When Rental managers are blocking off dates, they are usually doing so to prevent anyone from booking those dates. With RentalBell, Rental managers can block off dates from one location (RentalBell) and leave it to RentalBell to sync these blocked dates with all connected channels. Blocking off dates don't need to be made directly on any channel calendars anymore, so importing reservations only is what we recommend.

Rental Availability Window
With RentalBell, you can control how far in advance travellers can actually book your rental. These settings will be shared with all your connected channels so you don’t have to worry about logging into each of your channels to control this.

With RentalBell, you can control how far in advance travellers can book your rental. These settings will be shared with all your connected channels. To set an availability window for a rental, follow the steps below:

  1. Log into Rental Bell.
  2. If you have already added your rental to RentalBell, then you’ll see a button to the top right of the calendar that says Calendar Tools. Click that and then choose Rental Availability Window.
  3. Select how far in advance you would like to accept bookings for and click Save Changes. RentalBell will make all future dates beyond your availability window unavailable and sync these changes with all your connected channels.
  4. If you have a RentalBell availability calendar showing on your website for your rental, you have the option to have those future dates that are beyond your availability window appear as unavailable. This can be toggled on or off at anytime.
Note: Some channels (eg: AirBnb) allows you to set an availability window through their system. If you have enabled this feature on a channel, please turn it off to avoid conflicts and only control your availability window with RentalBell.

By default, there is no availability window specified for AirBnb hosts. If you have specified one in the past and would like RentalBell to manage your availability window, here is what you need to do:

  1. Log into Airbnb.
  2. Select Your Listing
  3. Click Calendar or Go to Calendar
  4. Click Availability Settings
  5. Beside the Reservation Preferences heading, click Edit.
  6. For the Availability Window section, choose All Future Dates and then click Save.
  7. Now you can use RentalBell to control your availability window for all your connected channels. For help with how to do this, see the FAQ: Hot to create a rental availability window.
Rental Preparation Time Tool
The Rental Preparation Time tool automatically blocks off a night or series of nights before and after each booking to allow time for you to prepare the rental for the next guests and avoid back to back bookings. By having RentalBell control your preparation time settings, it saves you time from having to go into each of your connected channels and manually blocking off dates. These feature can be quickly turned on or off at any time.

Here’s how to set a rental preparation time for your current and future bookings for your rental.

  1. Log into RentalBell.
  2. If you have already added your rental to RentalBell, then you’ll see a button to the top right of the calendar that says “Calendar Tools”. Click that and then choose “Rental Preparation Time”.
  3. Select how many nights you wish to block before and after each reservation.
  4. Click Save Changes. RentalBell will sync these changes with all of your connected channels. On the RentalBell calendar you’ll see the blocked nights before and after each of your reservation which is indicated with a rose shaded color and clock icon.
  5. Repeat these steps if you wish to change the number of nights or disable this feature.
Note: Please be sure to disable the rental preparation time feature with all your connected channels like AirBnb and VRBO to avoid conflicts.
RentalBell will not make any changes to existing bookings that do not meet the minimum rental preparation time. RentalBell will only block off nights if they are currently available.

By default, there is no rental preparation time specified for AirBnb hosts. If you have specified one in the past and would like RentalBell to manage the rental preparation time for AirBnb and all your connected channels, here is what you need to do:

  1. Log into Airbnb.
  2. Select Your Listing.
  3. Click Calendar or Go to Calendar.
  4. Click Availability Settings.
  5. Beside the Reservation Preferences heading, click Edit.
  6. For the Preparation Time section, choose None and then click Save.
  7. Now you can use RentalBell to control your preparation time for all your connected channels. For help with how to do this, see the FAQ: How do I set a rental preparation time?

If you see dates blocked off on your calendar that are rose in colour it means that those dates have been blocked and are not available to rent. Either you blocked off these dates yourself through RentalBell, a connected channel, or they have been automatically blocked off if you have enabled an rental availability window or rental preparation time. A rental preparation time block is indicated with a clock icon.

Rates, Subscriptions and Free Trials
RentalBell charges a monthly fee for each rental. The price per rental drops the more rentals the customer has. After the free trial, each payment occurs on the monthly anniversary date for the rental and is made secure and is powered by STRIPE. RentalBell does not store any personal credit card information locally.
RentalBell currently offers two subscription plans: Basic and Prime. The Basic plan which has limited features is free and the Prime subscription is $5.99/month for the first rental. The price per rental drops the more rentals you have. You can compare our plans here and view our rate structure here.

There are two ways you can upgrade or downgrade your rental subscription for your rental. The easiest way is to visit the Subscriptions & Billing page, scroll down to the My Rentals section and click Upgrade to Prime or Downgrade to Basic in the Subscription Type column.

Alternatively you can visit the rental page for the rental you wish to upgrade/downgrade. Click the pencil icon to the top right to edit the rental. Choose the Prime Rental or Basic Rental option and then click Save Changes.

You can have unlimited rentals using the basic service and it won’t cost you a dime. Please contact us for pricing if you would like to enrol over 20 rentals into the Prime subscription plan. You can compare plans here and view the pricing for up to 20 rentals here.
We believe in our product so much that we are happy to offer an extended free trial with the knowledge that most of our free trial customers will convert to a paid subscription after the free trial is up.
Rentals and Properties

A rental is a rentable unit. Examples of a rental would be:

  • a vacation rental
  • a hotel room
  • A room in a bed and breakfast
  • One of many rentable units on a property

A property is defined as the structure or location that contains one or more rentals. Some examples of a property are:

  • A Bed and Breakfast that contains multiple rentable rooms
  • A hotel
  • A resort
  • A vacation property that contains more than one rentals that can be rented out individually
If you have more than one rental in the same property (eg: a Bed and Breakfast with independently rentable rooms), it can help to categorize them under a single property. This is especially useful if you also have rentals in another property because then you can separate the two and stay better organized. Analytical charts and graphs for Prime rental subscriptions are available at both the rental and property level and offer valuable insights into the performance of your property as a whole.
Analytics
Each rental you have listed on RentalBell will have its own rental-specific analytical data. RentalBell also provides property-wide or account-wide analytical data showing the overall performance of specific channels, total occupancy rates and more. This overview analytical data is shown below the multi-calendar page for your account or for a property.
The Occupancy Rate by Month chart displays what percentage of nights in a given month that a rental or property is booked. For example, a 100% occupancy rate means that every night for the month is booked. Once you have had your rental or property listed with RentalBell for a year or more, a second line will appear showing the previous’ years occupancy rate, allowing you to compare how your rental has been preforming. This data is also available at the property or account level if you have more than one rental.
The Booked Nights by Month chart shows the total number of nights that are booked for each month and is further broken down by channel. You can select the drop down menu to the right of the chart to view future or previous years (if available). You can also view the total nights booked from a specific channel by clicking on the channels in the legend that you don’t want to have appear.
The Average Length of Stay chart shows how many nights the average booking is for each channel your rental is listed on, including rentals added manually through RentalBell. You can see and compare the average booking length with future or previous years (if available) by choosing a different year from the dropdown menu on the top right of the chart.
The Share of Bookings by Channel chart breaks down your bookings by channel as a percentage of your total bookings. This helps you understand at a glance what channels are performing best for you and which ones are not. You can also see this breakdown by percentage of nights as well as breakdown the data by year.

The New Bookings chart shows when new bookings were generated for your rental and added to your calendar. RentalBell starts monitoring this data the moment you sign-up and start adding channel calendars and bookings to your rental. This becomes really useful information for understanding what months travellers like to start planning their holiday and book their future stay with you.

Note: Make sure not to confuse the New Bookings chart with when the check-in for your bookings will occur on your calendar. The New Bookings chart only tells you when you received a new booking, from which channel and how many bookings you received for a given month.

The Lead Time chart shows the average latency between the day the booking was initiated and the day of the check-in. This information is displayed for each channel you are listed on and can be broken down by year.

RentalBell starts monitoring this data the moment you sign-up and start adding channel calendars and bookings to your rental. The Lead Time chart is useful because it helps you understand the behaviour of your guests. If you learn, for example, that your rental typically has a 30-day lead time, then you don’t need to panic if you have an empty month 60 days from now.
Other FAQs

With a Prime rental subscription, you can add bookings or block off dates directly from the RentalBell platform. These additions to your calendar will update the calendars on all other channels you are listed with (up to 15 min delay depending on the channel). Here's how you do it:

  1. At the top right of the calendar on a your rental's page are the Add Booking and Block Dates buttons.
  2. Clicking either of these buttons will open a window that allows you to complete the details for the booking. Alternatively, if you are on an individual rental's page (not a page with multiple rentals listed), you can simply select the dates on the calendar directly and it will open the booking window with those dates inserted.
We made a video for this. Please view the instructional video above.